How To: Change Welcome Screen Language in Windows 7
14 Aug 2011
After 10 years of use, I’ve finally said goodbye to Windows XP and upgraded to Windows 7. Everything is nice and dandy, except for the fact that my operating system is in Spanish.
Spanish is the primary language where I live, so any operating system acquired here is also in Spanish. I tried contacting Microsoft about buying a Windows 7 install disc from the U.S. or downloading it from their U.S online store, but they were not very helpful.
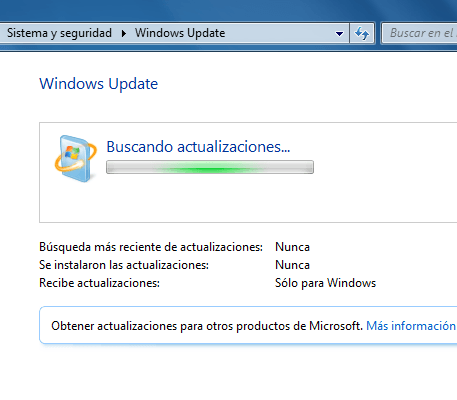
I ended up buying Windows 7 Ultimate because it’s the only one that allows me to change the display language. To change the display language simply open up Windows Update (it has the same name in Spanish) and let it search for updates.
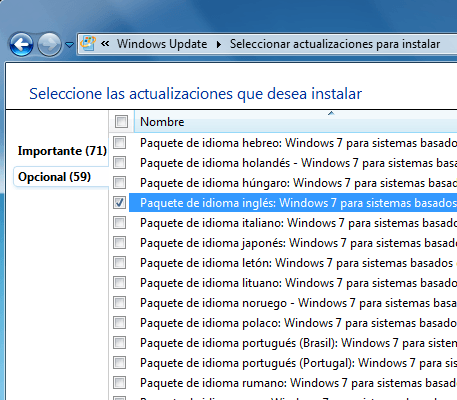
As soon as it’s done it will show a list of available language packs under Optional Updates. In this case, I chose English because it’s the one I needed.
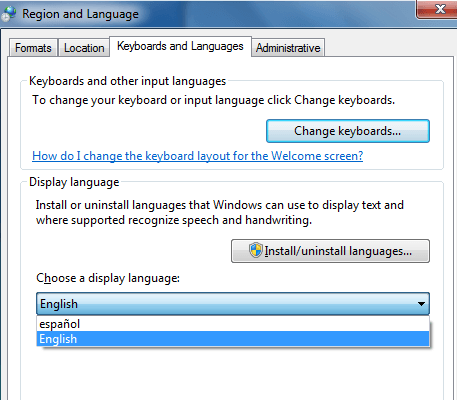
After it’s done downloading, head on over to the Control Panel and click on Region and Language. If you’re having trouble locating it, it’s the one that has an icon of a globe and a clock. Once there, you can change the display language by selecting the language pack you just downloaded.
Here’s the tricky part: when you log off or your computer decides to finish an update before being shutdown you will notice the progress prompts are in whatever language the operating system was originally installed with.
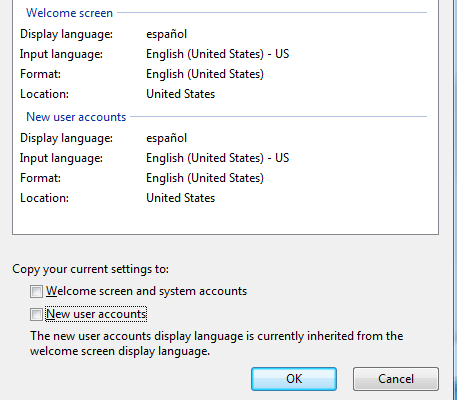
To change the display language of the Welcome Screen, go back to the Region and Language options and click on the Administrative tab. Click on the Copy settings button and make sure you check Welcome screen and system accounts and New user accounts under Copy your current settings to.
That’s it! Now almost the entire system is in English. I say almost because there’s still some drivers and device names here and there that are named in Spanish, such as my network interface card.
I still need to get my 5.1 sound speakers working, so I’ll post about that another time.

